During the trip home from the west coast last year, I noticed some strange behavior in the fuel gauge on the Nightowl. It would suddenly show empty and then gradually return to its previous position. This post describes how to fix this problem.
The Root Cause
When I finally found time to perform the combined 6k, 12, and 18k service on the Nightowl, I did my usual reading of fault codes from the Bike before I started pulling off the Tupperware. Hooking up the GS911, I noticed the following smoking gun for the fuel gauge problem.
800EA9 : Fuel level sensor, open circuit or short circuit to battery positive
Currently present : NO
Engine warning light (MIL) : NO
Frequency count : 1
Logistic(Healing) count : 21
..Fault Code History :
....Record number : 1
....Odometer : 37495.3 mls
....ABS time : 2353523
....System Voltage : 14.00 V
....KL15 Status : 1
This told me that the sender was causing the aberrant behavior and that I needed to check it out.
A Common Ailment
This isn’t the first time a fuel gauge has gone wonky on me. The Vector had similar problems and required me to occasionally remove the fuel pump/sender assembly, detach the fuel sender element and float, and clean the tarnish off the sender element.
The sender element is a series of bare-metal contacts and a wiper that slides over them. Depending on where the wiper touches the strip of contacts, a different resistance is reported to the bike and that varying resistance translates into a given level of fuel in the bike.
The problem is that today’s gasoline contains up to 10% ethanol (among other additives) and some of these additives have a tendency to cause slight oxidation/corrosion of the metal components in the gas tank. This effect is so slight, you generally don’t notice it. It does, however, create an oxidized layer on the metal components that is not conductive. Suddenly, that wiper passing over those metal contacts on the fuel sender no longer can make contact, and the bike sees really bizarre fuel sender resistance values, and the gauge starts looking like a sound meter playing a disco song.
The solution for the Nightowl, I assume, will be similar to what I did for the Vector: clean the contacts and all will be right again.
The Procedure
I’m not going to cover the steps to pull off the tank Tupperware, remove the air cleaner, and remove the fuel pump/sender flange. That’s covered very well by the BMW service manual. I will say, however, that the retainer for the fuel pump/sender flange requires a special tool to remove and install. I didn’t use the special tool. Instead, I used a hammer and a cold chisel and gently tapped on the chisel when placed on the protrusions on the flange retainer. It will move in small increments, but you’ll get it off and back on.
Once you have the fuel flange out with the pump/sender bracket attached, it looks something like this.
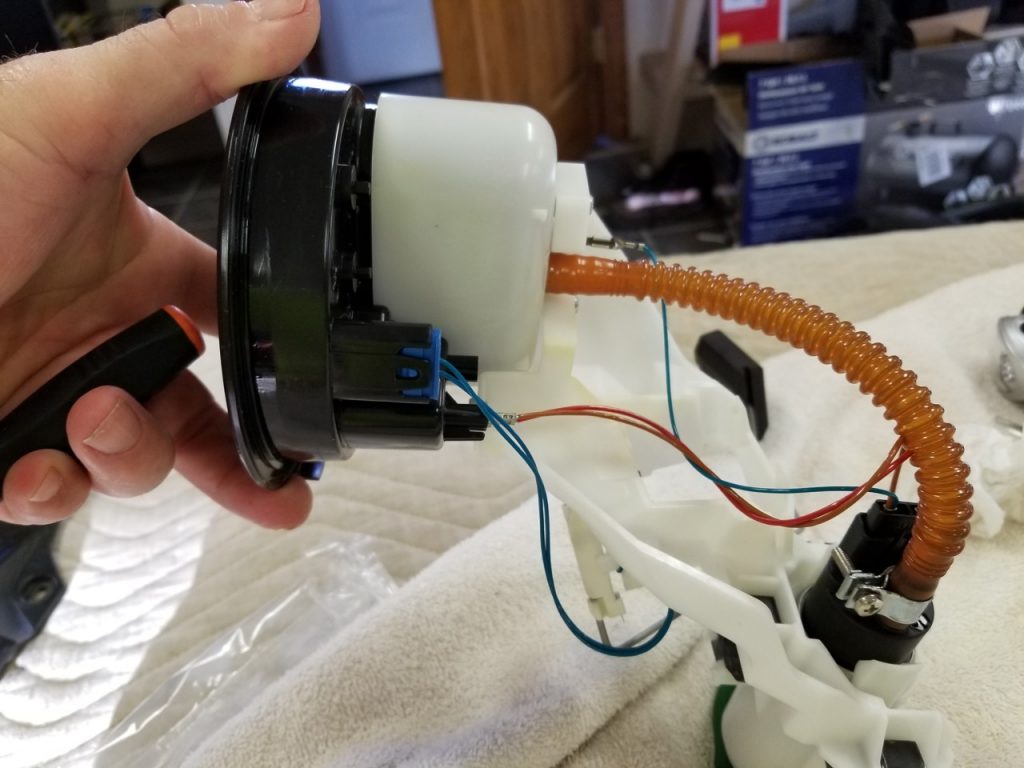
Unplug the fuel sender wires (blue) from the inside of the flange. A small standard screwdriver can help to gently lift the retaining clip for this plug.
Remove the fuel sender bracket from the larger pump/sender bracket. It’s a snap fit and remove from the underside of the pump/sender bracket. Once removed, the sender looks something like this:
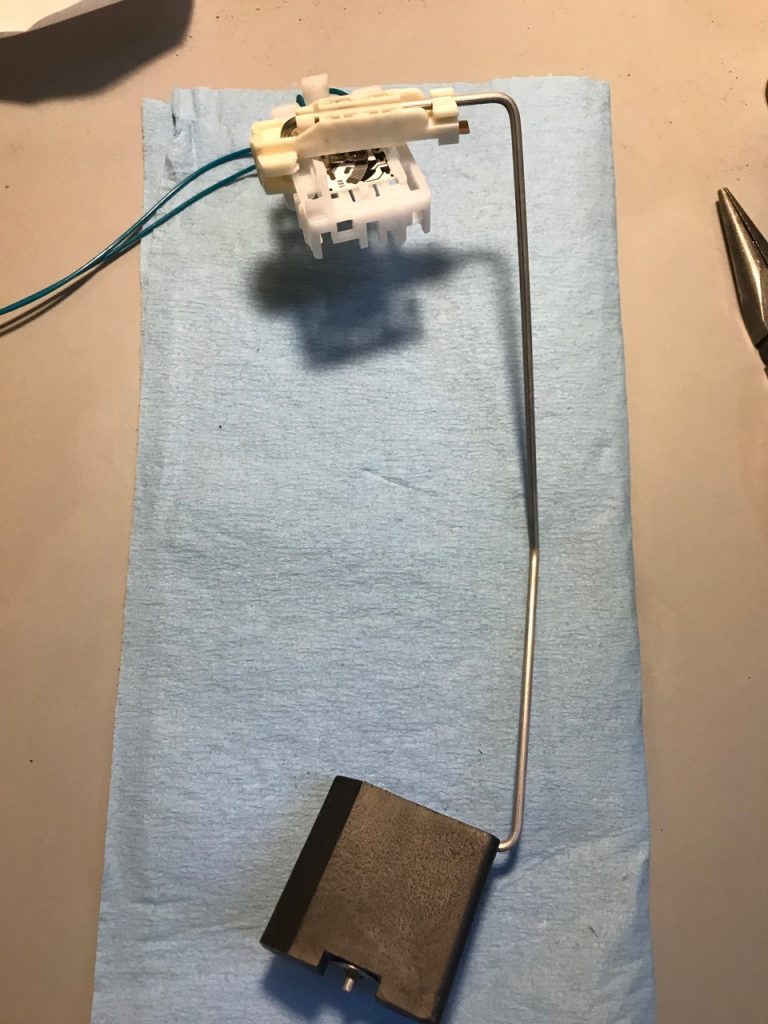
Here’s a closeup snowing the sender board bracket, a sender arm bracket, and the arm itself.
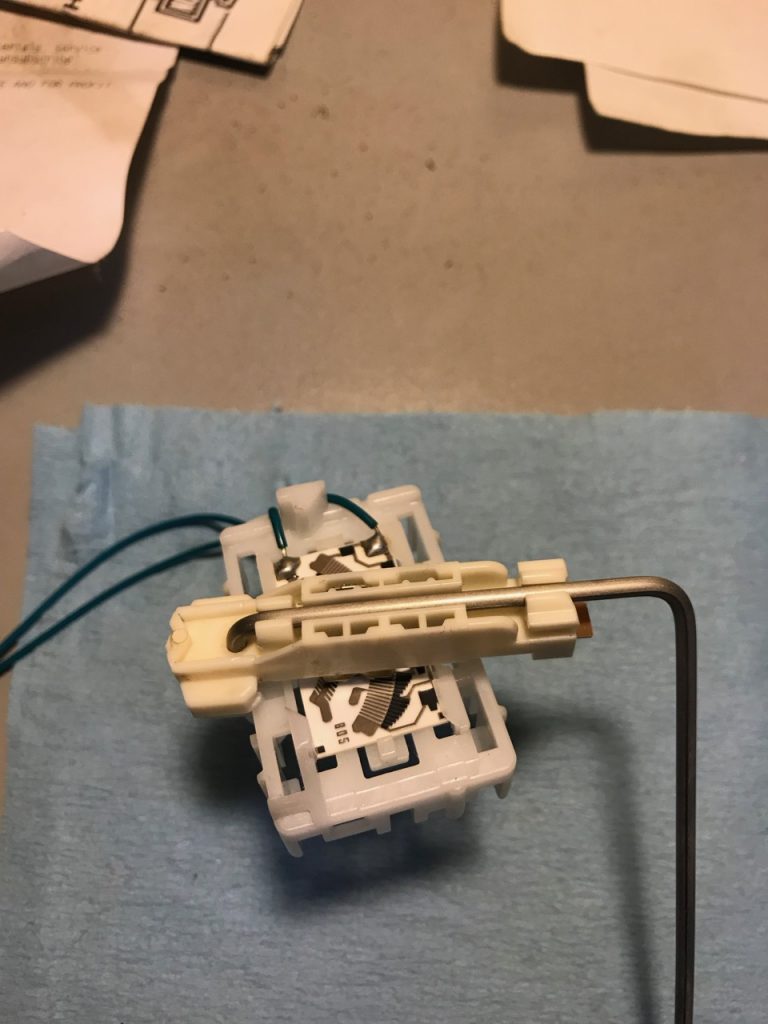
Start by removing the arm. The arm snaps into a plastic arm bracket and is held in place by two clips. You can gently pry the arm out of the right clip with a small standard screwdriver (below).
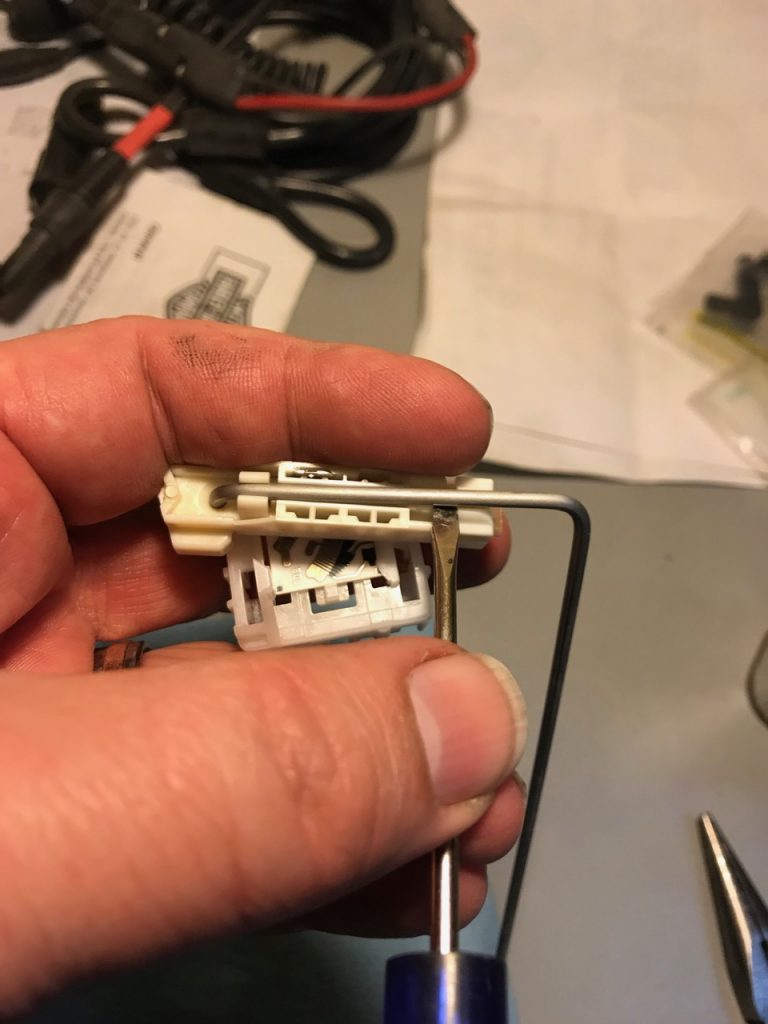
To give yourself some additional room to pry the arm out of the other clip, turn the sender over and press up on the protruding end of the arm (below).
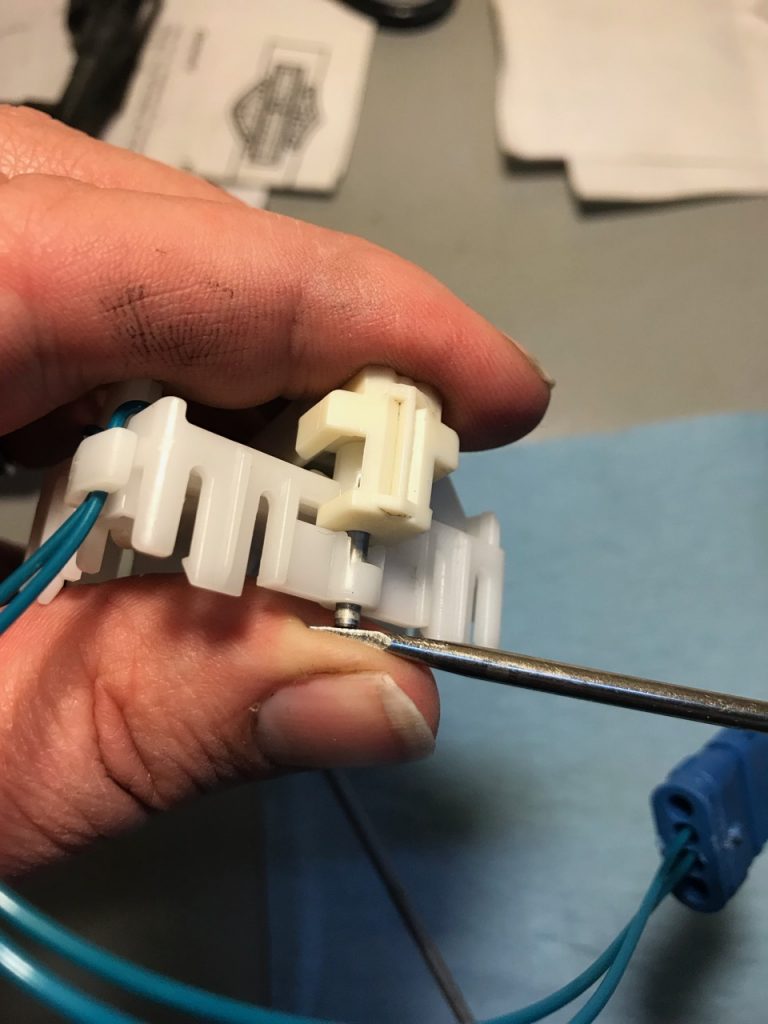
Now you can pry the arm out of the left clip (below). The arm will pull out of two holes in the arm and a hole in the sender board bracket.
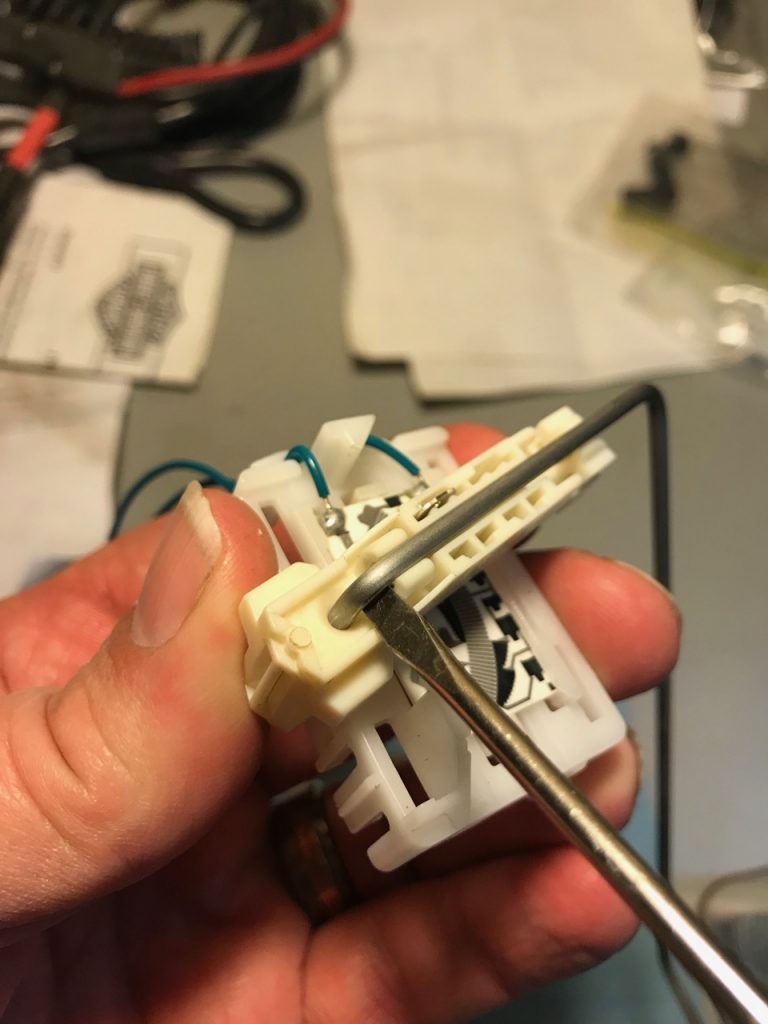
Now you have the board bracket by itself (below). You can see that cleaning it on the bracket is likely to get cleaning solution in lots of nooks and crannies in the board bracket, which will end up in your gas tank if you don’t clean it all off. To avoid that chore, I elected to remove the board from the board bracket.
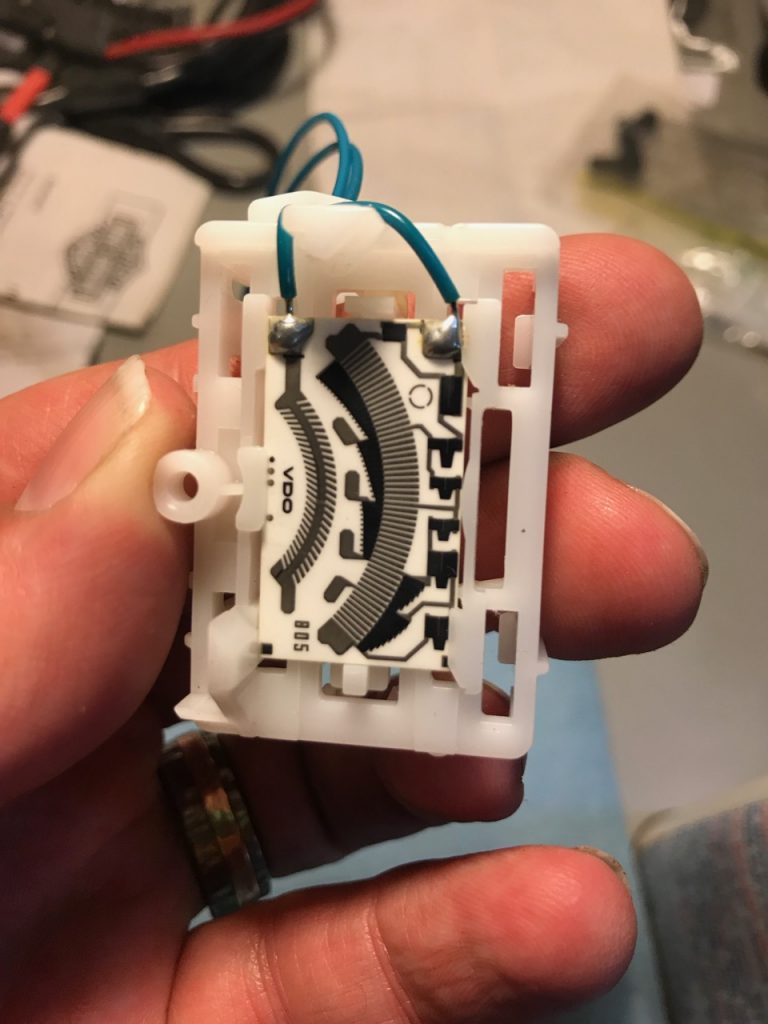
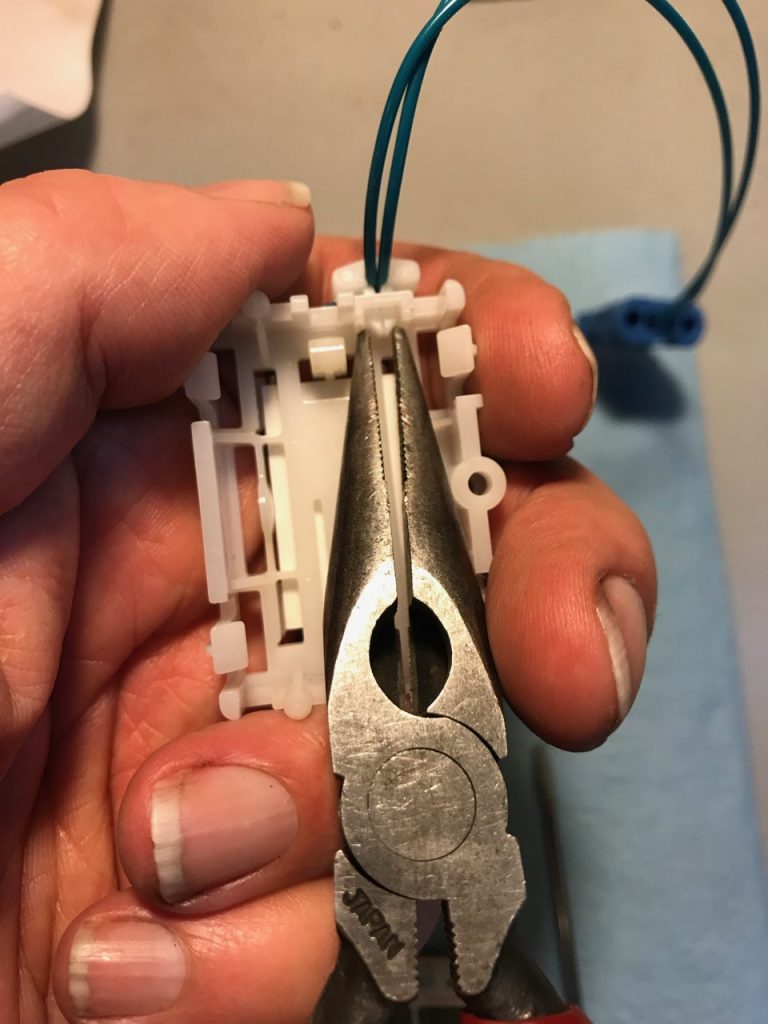
To remove the board, you’ll have to free up the wires, which are held in place by a strain relief clip (upper right in photo below).
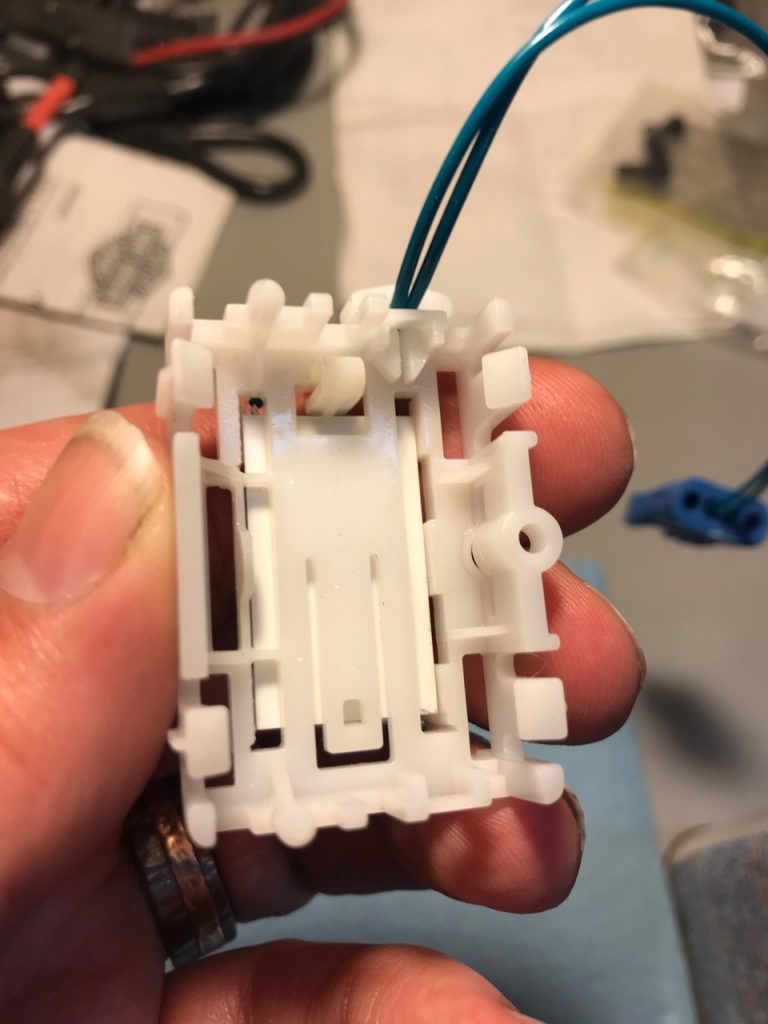
To remove the strain relief clip, compress the clip and push upwards out of the bracket. I used a pair of needle nose pliers (below).
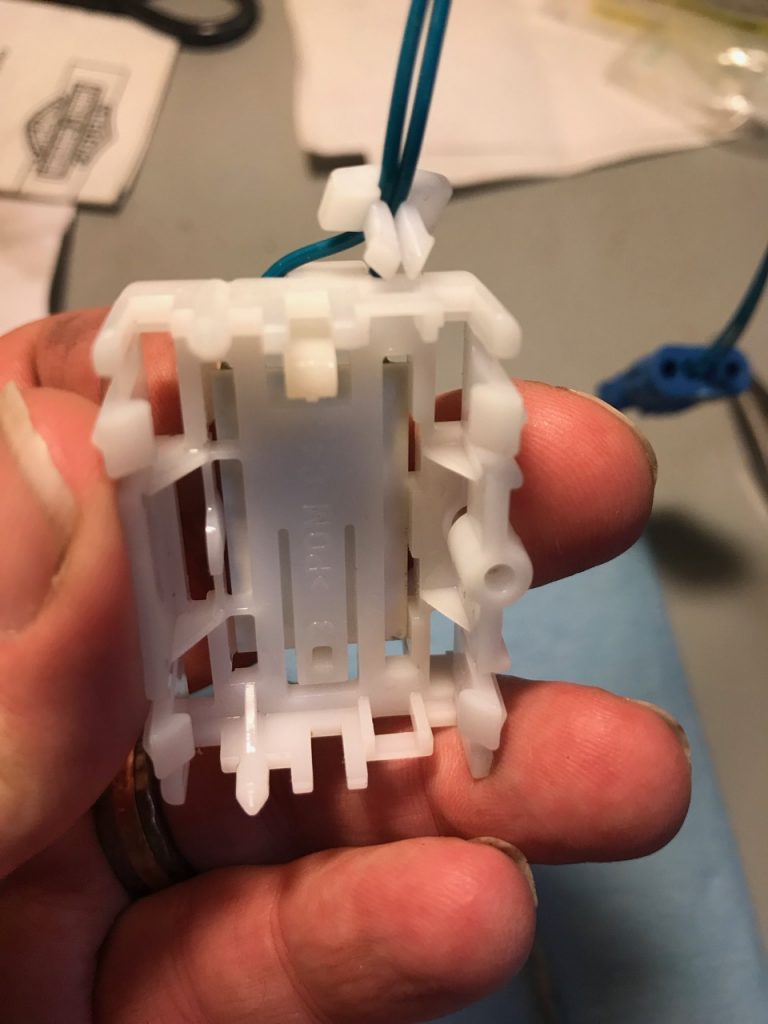
Now you can gently pull up on the wires and they’re free (below).
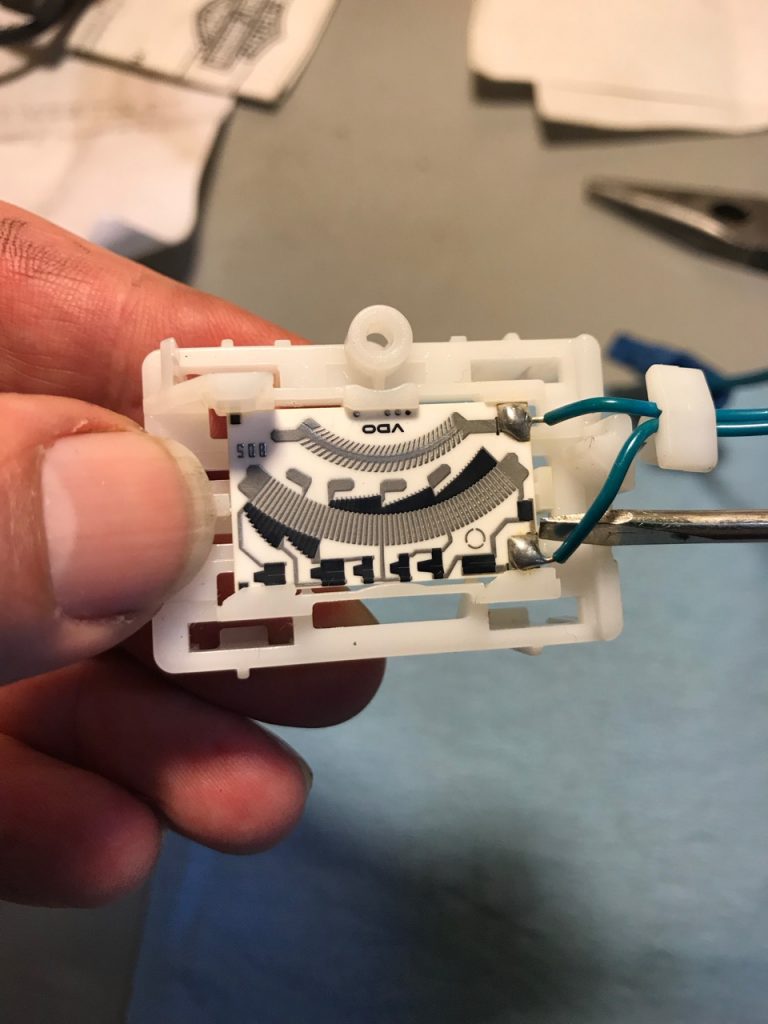
Refer to the image below. The board slides out from right to left. It is held in place by a stop on the right and a clip on the left (under the thumbnail). Gently pull the wires up over the post on the right side of the bracket. Do not remove the strain relief clip; you want that to do back exactly where it is on the wiring. With the wiring free, press the board retaining clip down into the bracket and slide the board out from right to left.
Here’s the board sliding out after clearing the retaining clip (below).
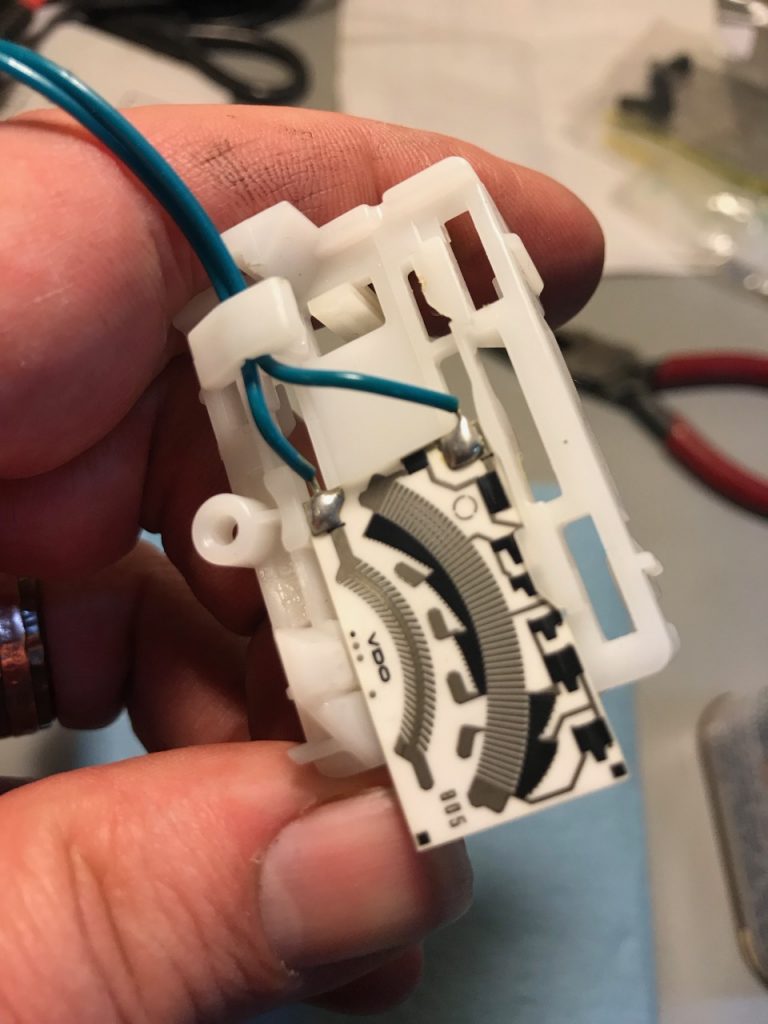
Here’s the board free and ready to be cleaned (below).
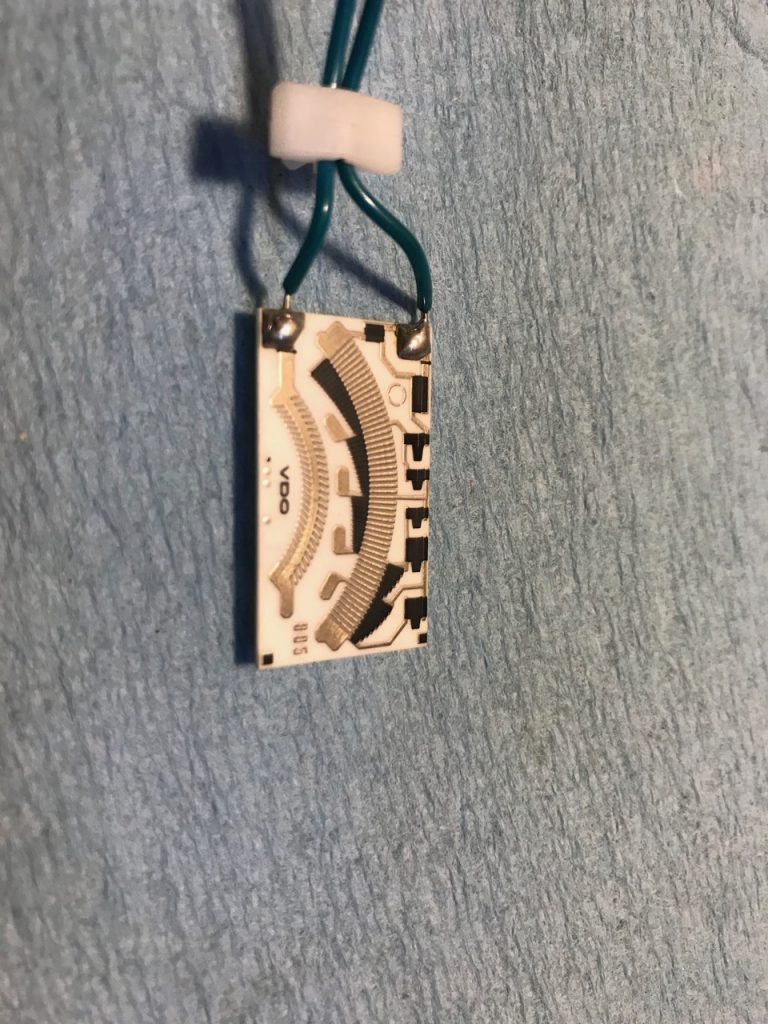
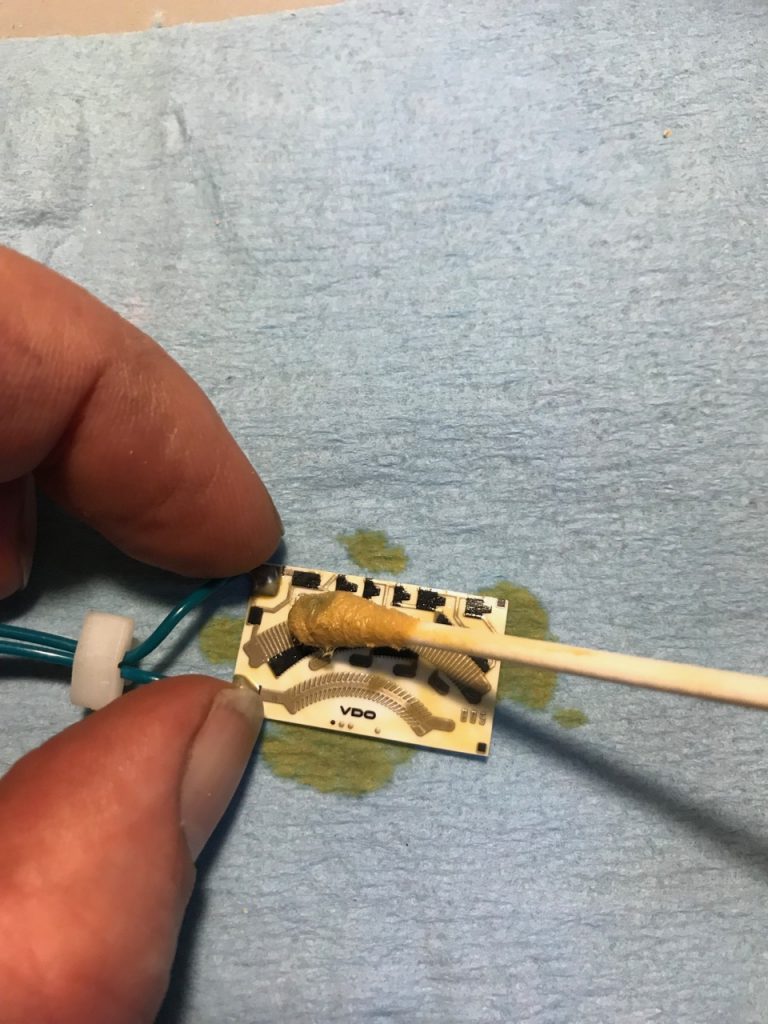
I used Brasso, but any non-abrasive metal polish should do quite nicely. You don’t want to put too much pressure on the contacts or you’ll burnish them right off the board. I used a Q-tip (below). You may not notice any significant change in appearance in the contacts. Again, your goal is to not take off the contacts. You will, however, likely notice some dark tarnish appearing on your Q-tip. When you have the board clean, rinse off all of your cleaning/polishing compound and set the board aside.
Now we need to clean the wiper that slides over the contacts on the board. The wiper is on the underside of the plastic bracket that holds the arm. Here’s a look at the contacts (below).
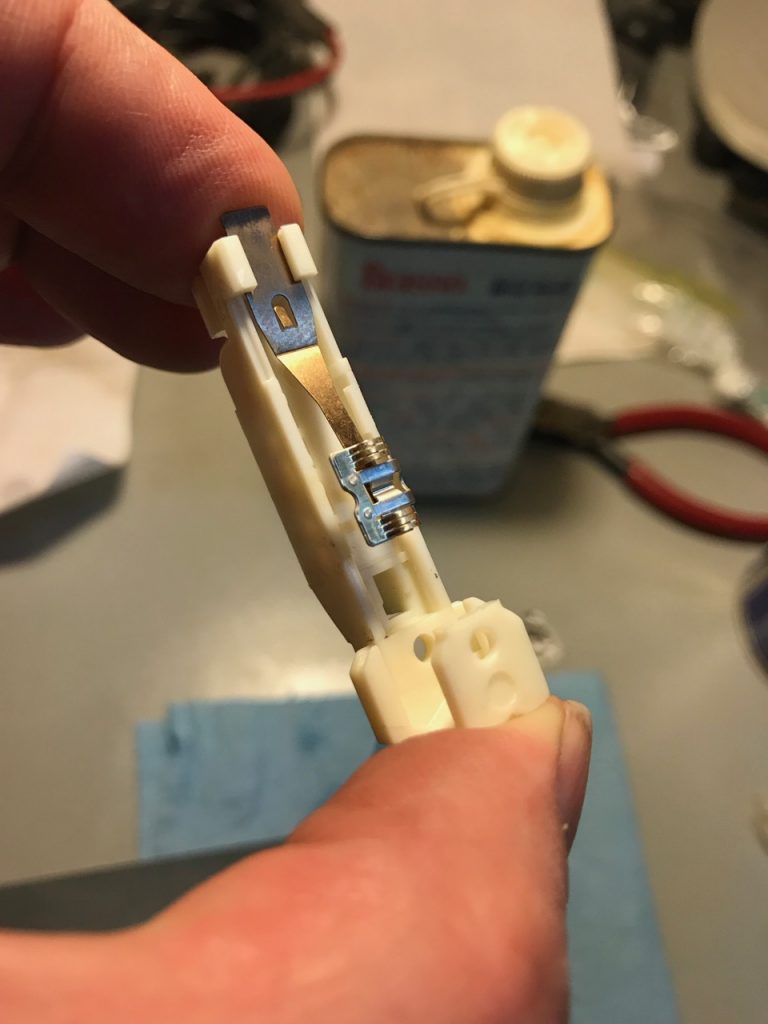
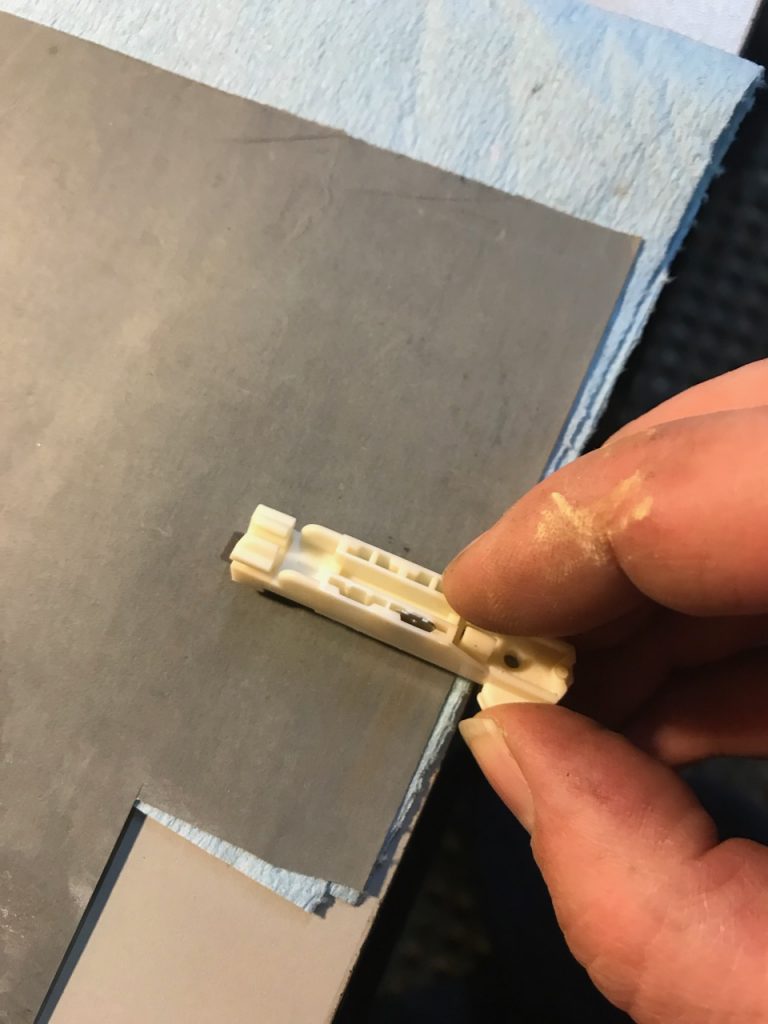
These contacts are small and easy to bend. Consequently, I elected to not go over them with the Q-tip because it would be too easy to snag on the open ends of the forked contacts. Instead, I decided to use some emery paper; I used 800 grit because that’s what I had readily available. The finer the grit, the better; I don’t think I’d go below 600. Due to the protruding leg of the arm bracket, I positioned the emery paper at the edge of a workbench and then slid the arm back and forth on the emery paper to clean it (below). I also varied the angle that I held the arm so the wiper would be cleaned along a wider area along its curved surface.
Now it’s time to reassemble everything. First, slide the sender board back into the board bracket. The VDO lettering on the board should be position towards the hole for the wiper arm. Here’s the board partially slid into place (below).
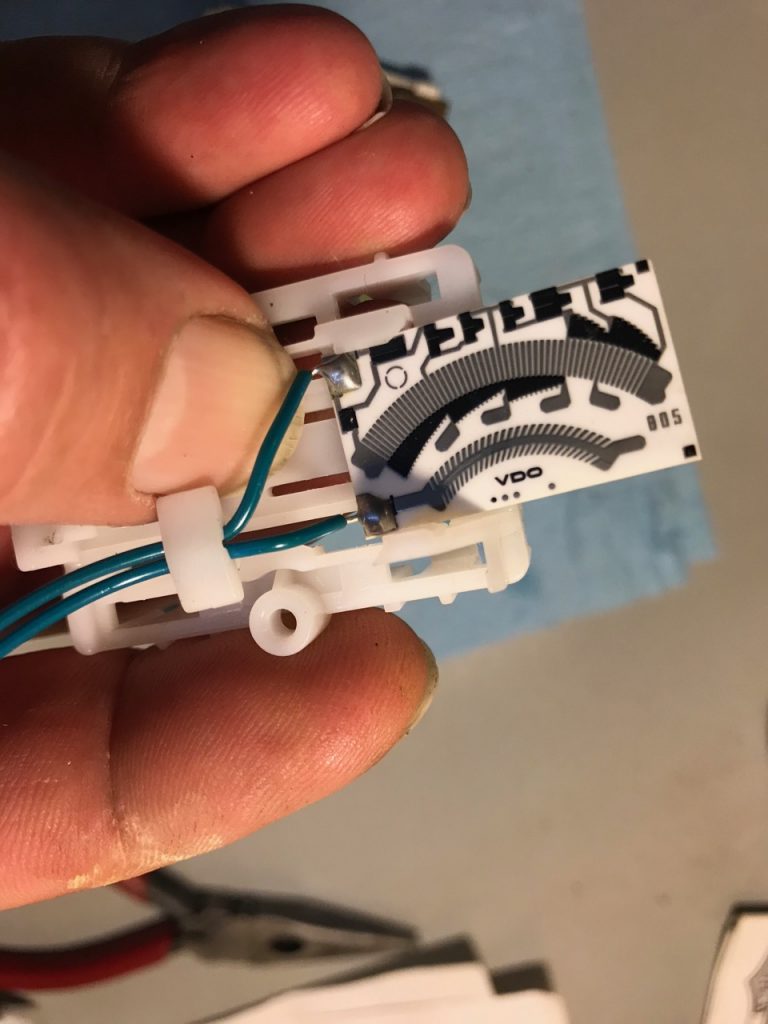
Here’s the board fully slid into place. Note the exposed retaining clip to the left of the board (below). Gently pull the wires up over the end post so you can reattach the strain relief.
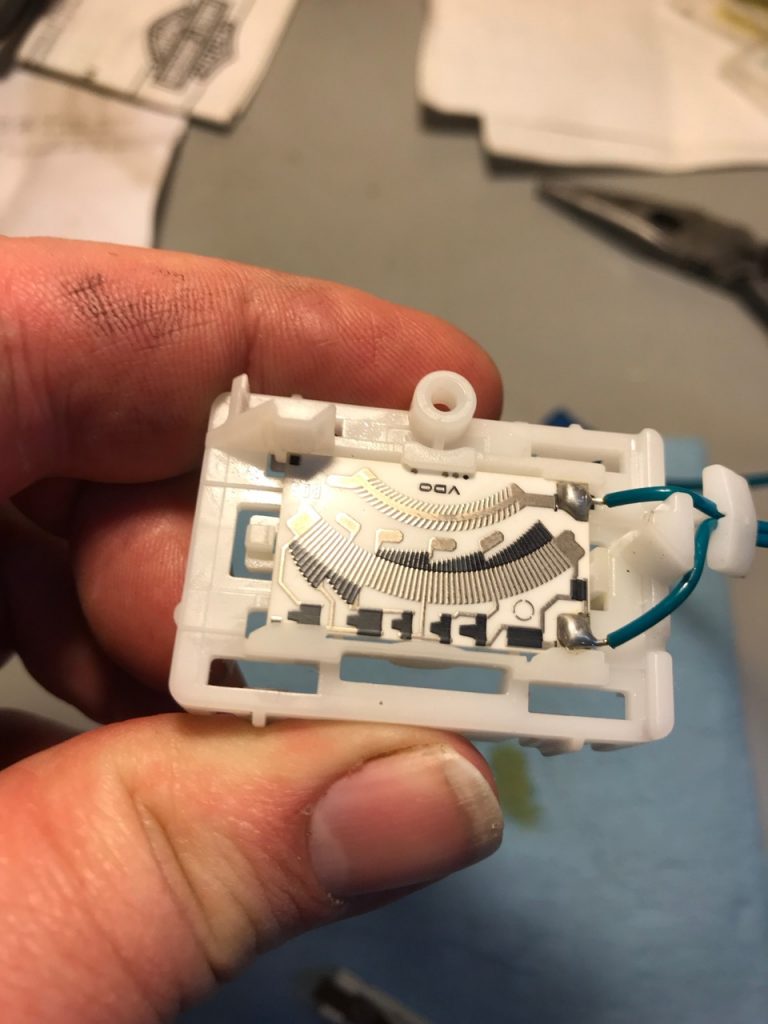
Position the strain relief clip over it hole and press it not place (below).
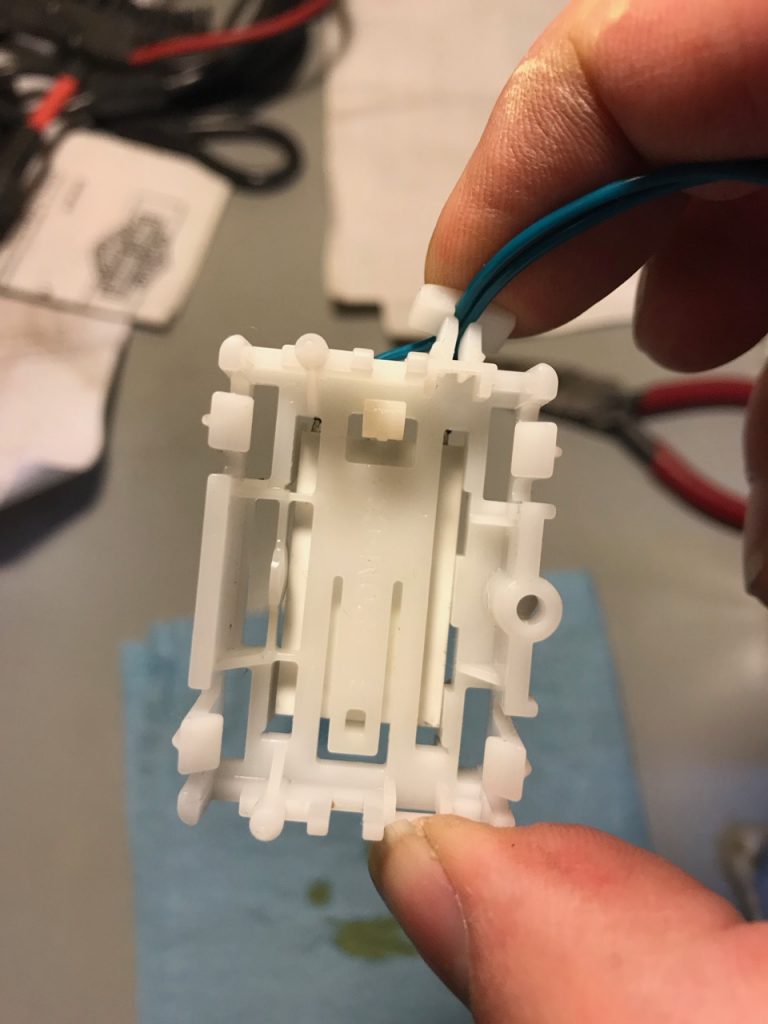
Make sure the teeth on the strain relief clip fully engage (below). We don’t want this wiring coming loose.
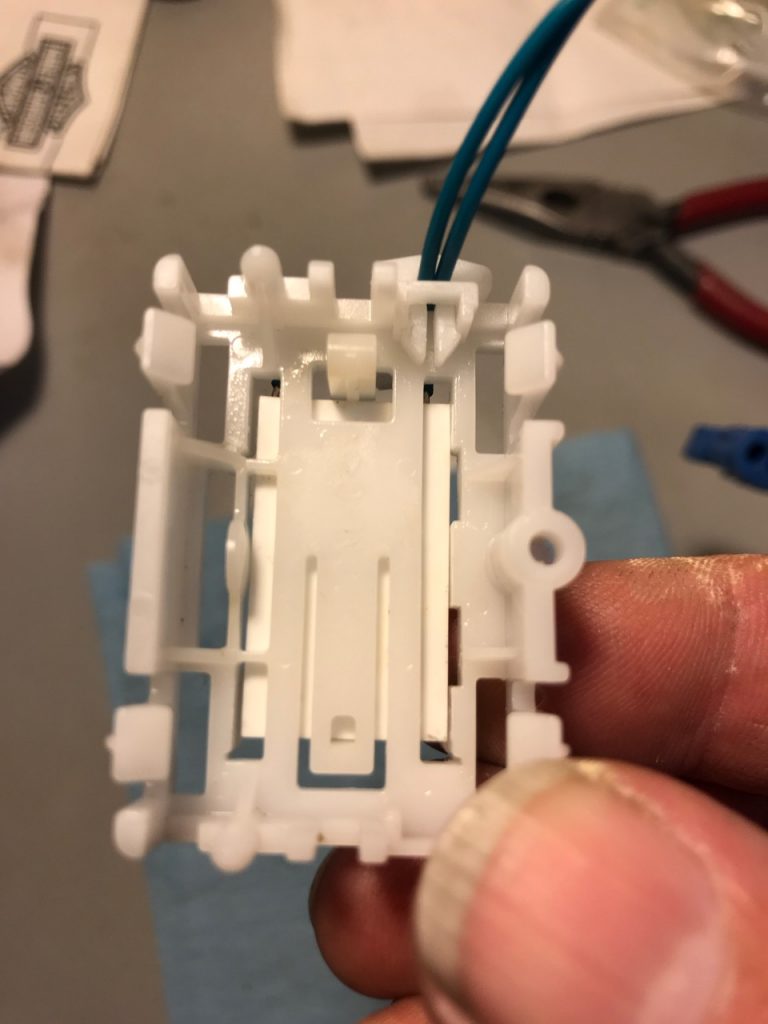
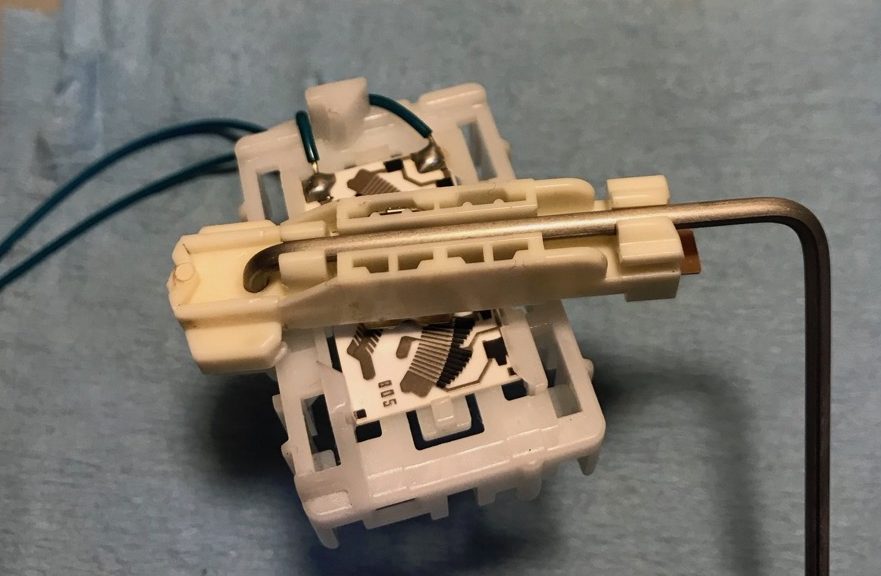
Position the arm bracket on the board bracket (below). You should be able to sight down the hole in the arm bracket and see it align with the hole(s) in the board bracket.
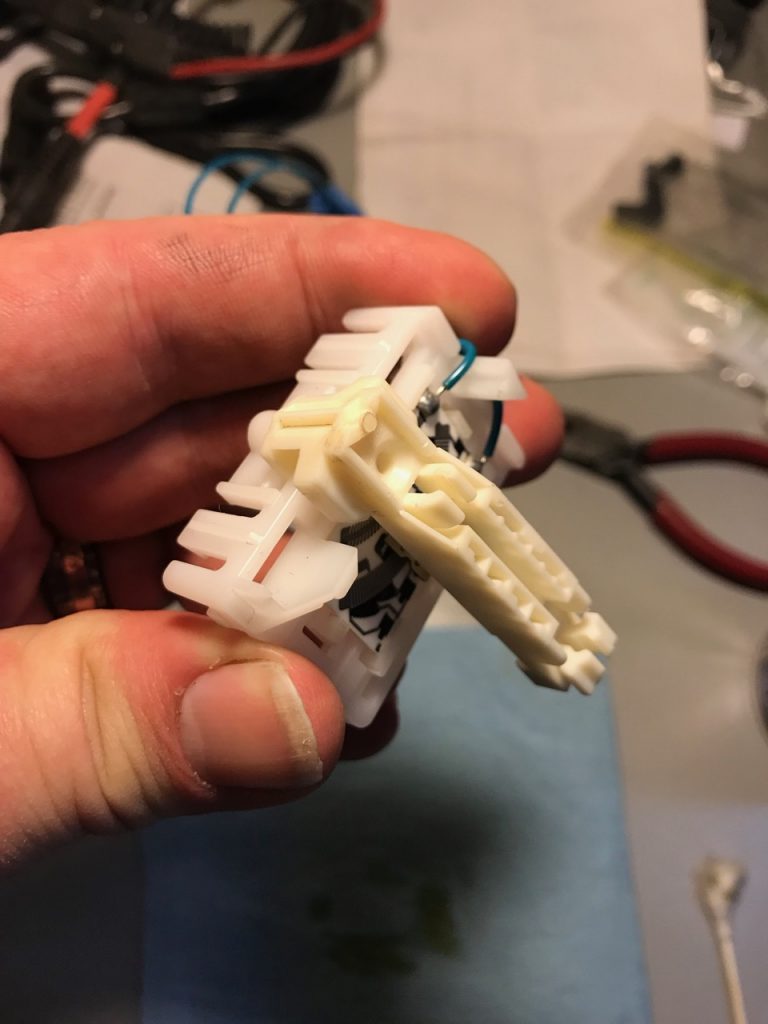
Insert the end of the arm into arm bracket and gently maneuver it through the holes in the arm bracket and the hole(s) in the board bracket (below).
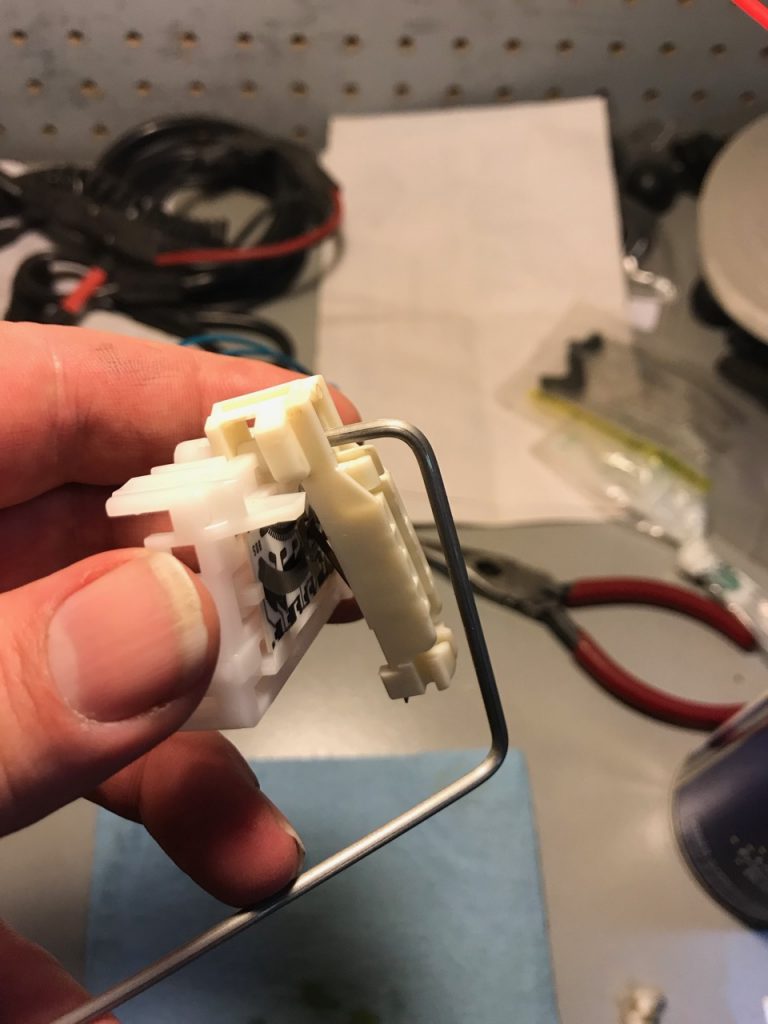
With the arm aligned through all of its locater holes, gently push on the arm to seat it in the retaining clips (2) on the arm bracket (below).
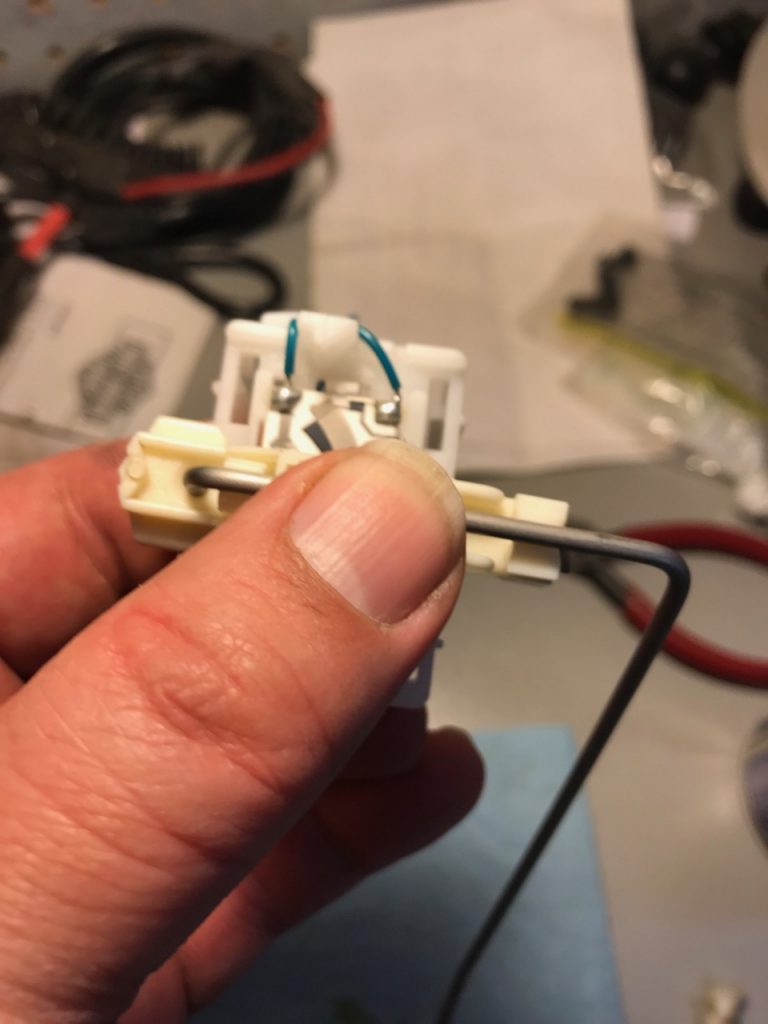
Gently move the arm through it’s range of motion, making sure that the wipers engage with the sender board throughout the full range of arm movement.
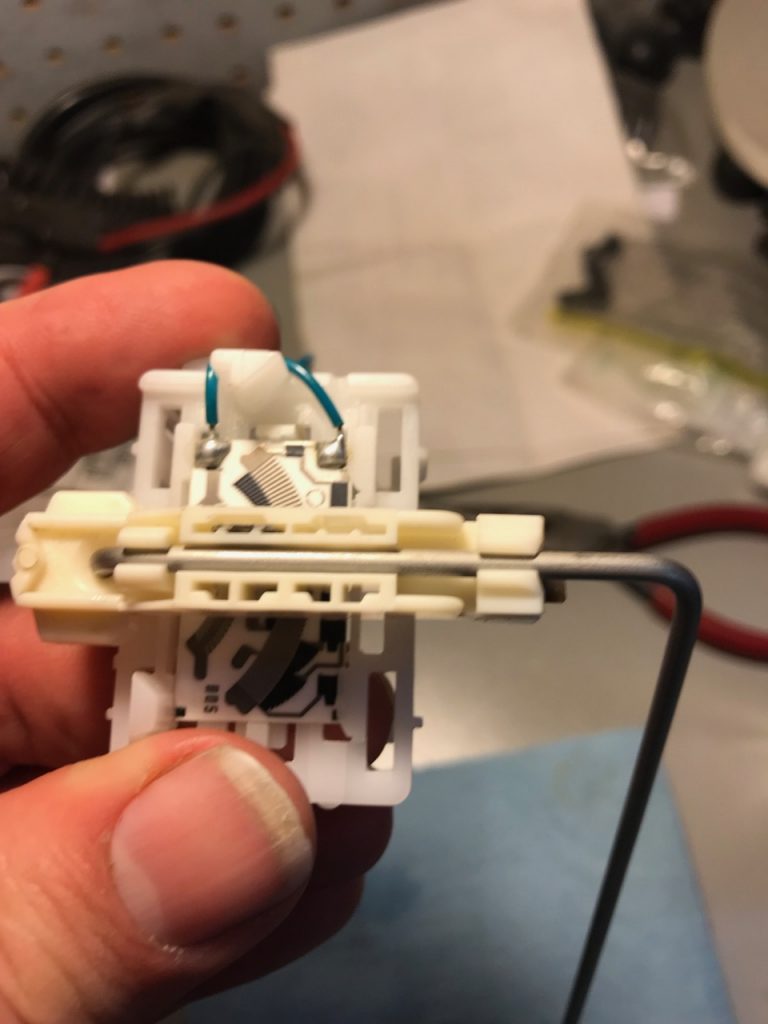
Re-install the fuel sender bracket into the pump/sender bracket; it snaps into place. Then you can reconnect the fuel sender plug to the inside of the fuel flange.
That’s it! You’re ready to re-install the fuel flange into the tank and reassemble.
Update: The Results (May 1, 2019)
After cleaning the fuel sender, I went on the first trip of season, a nice 1,700-mile jaunt down to Virginia and North Carolina. During the trip, there were no dancing fuel gauge problems. A quick fault code read by the GS911 after the trip revealed no codes regarding the fuel sender.
I rock! I rule!
Ok, so I’m a little too excited about this minor victory. I did, however, save a stack of dollars by not taking it to the dealer. The fuel sender, part number 16 14 8 554 069, lists at $153 and I’m sure you’d spend another $200 minimum in labor.
I did this fix with 38,620 miles on the bike and I fully expect the problem to crop up again at some point. At least next time I’ll have the procedure to fix it.
Gallery
Here’s a full gallery of the photos for faster browsing.

The fuel pump/sender bracket. You can see the fuel sender arm to the lower-middle of the bracket. Photo courtesy of Jack Sapp. 
The fuel sender after removal from the pump bracket. 
Closer look at the fuel sender and the elements that need cleaning. 
Pry up on arm at outer clip. 
Push up on arm end to give you some pry room for second clip. 
Pry arm out of second clip and remove. 
Sender with arm removed. 
The strain relief for the sender wiring is to the upper right. 
Removing the strain relief from the sender mount. 
The strain relief is now loose. 
With the wiring pulled over the end post (right), push down on the retaining clip (left thumb fingernail) and slide the board out from right to left. 
The fuel sender board is half-way slid out of its channel. 
Fuel sender board out and ready for cleaning. 
A little Brasso (or other non-abrasive metal polish) to clean the tarnish off the contacts for the fuel sender. 
Closeup of the underside of the fuel sender arm bracket, which has the pickup wiper that slides along the board. 
I used 800 grit emery paper to clean the wipers. Note how I have the protuding leg of the arm off the edge of a table top. 
Sliding the board back into its bracket. 
With the board back in place between its clips, pull the wiring over the end post (right). 
Press the strain relief clip back into its hole until it snaps into place. 
Strain relief clip re-installed. 
Position the sender arm bracket over the board, hanging from the protruding leg. 
Insert the end of the arm into the hole in the arm bracket and through the board mount, and through the lower end of the arm bracket. You read that right; you’re threading the arm through three holes. 
Push down on the arm to clip it into place. There are two clips in the arm bracket that need to hold the arm secure when it’s in place. 
The fuel sender arm re-installed.

One thought on “Cleaning the K1600 Fuel Sender”